

October 22, 2018
Washer Repair
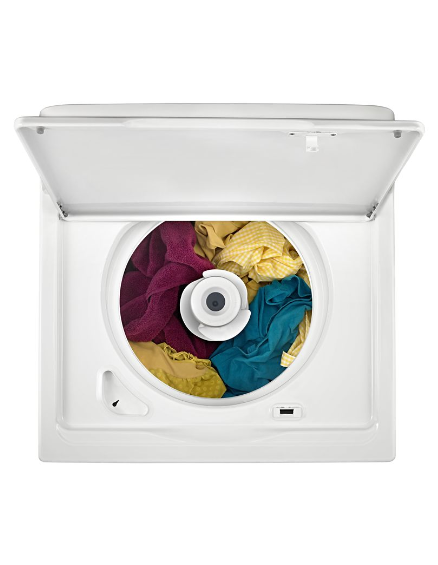
The convenience a whirlpool washer model WTW4616FW provides a household is a notion not often considered until a problem with the appliance arises. One such issue is a non-spinning washing machine. When this alarming malfunction occurs, it is easy to believe your washer has finally met its demise, however, before you jump to that conclusion, you may want to troubleshoot your washer for one of the following part failures.
Always unplug your appliance or shut it off at the circuit breaker before starting a repair. When fixing your washer you should also turn off the hot and cold water supply valves. Protecting your eyes and hands by wearing safety goggles and work gloves is strongly recommended.
The Drive Belt
Your washer’s drive belt is found at the bottom of the appliance. It runs between the drive pulley and the motor pulley. During the wash cycle, the drive belt moves the washing machine’s tub. If the belt breaks or becomes too loose the tub will no longer rotate. Replacing the drive belt with a new one is the only way to fix the problem.
How to Replace the Drive Belt in Your Whirlpool Washer
-
Disconnect the water supply hoses from the back of your washer. Have a towel ready to clean up any water that spills out. Tape down the washer’s lid and place a large towel on the floor in front of your appliance. Tilt the machine forward to lay it down. Remember the washing machine is heavy, so we advise getting the help of a second person when tipping it forward.
-
Before you can access the drive belt, you’ll need to remove the belt cover. To do so, simply unthread the screws securing the cover to the bottom of your washer.
-
If the belt is still attached, use your hand to rotate it towards the drive pulley while slowly slipping it off both the motor and drive pulleys.
-
Put the new drive belt over the motor pulley, first. Then, pull the other end of the belt over the drive pulley. Keep rotating the drive pulley until the belt is firmly in place. Reinstall the drive belt cover with the screws you took out earlier.
-
With the help of another person, lift up the washer. Remove the tape holding the lid closed and reconnect the water supply hoses.
-
Plug your appliance in and run a wash cycle to make sure the washer tub is now spinning.
Lid Latch Assembly
When you close the lid of your washer the lid latch is activated, meaning the component tells the washer it is safe to start operating. A faulty lid latch will not relay that message, which leads to a non-spinning washing machine. Switching out the defective lid latch assembly for a new one should get your washer spinning once again.
How to Replace the Lid Latch Assembly in Your Whirlpool Washer
-
Slide your washer forward to gain access to the back of the appliance. Detach the water supply hoses and wipe up any water that drips out of the water lines.
-
Unthread the screws securing the rear wiring and tube cover, and remove it from the back of your washer. Then, take out the screws holding the upper, rear access panel to the washer frame. Lift the panel off the back of your appliance. Loosen the upper screws securing the hinges to the main top.
-
Now that the upper, rear access panel is removed, you can disconnect the lid latch wire harness from the control board. Once that is detached, pull the wires out of the control boards retaining clip, and disengage the tabs on the second retaining clip by squeezing them together.
-
Move to the front of your washer and tape the lid down. Pull the lid towards you and lift it up to rotate it back. You can either support the main top on a wall behind the washer or use a strap or chain to hold the top open. Once the main top is supported, pull the lid latch wires you disconnected through the hole in the main top. Follow the wires, which are covered by a rigid tubing, up to the lid latch and pull the tubing out of the retaining clips holding it in place.
-
After the wires are freed, unthread the mounting screws holding the lid latch to the main top of your washer. Take the defective component off your appliance and get rid of it.
-
Align the new lid latch with the groves in the main top. Attach the screws to secure the latch. Push the wiring tube into the retaining clips that run down the side of the main top. Thread the end of the wire through the opening and push firmly on the round retaining clip to block the hole.
-
Lower the main top and push back on it to engage the locking tabs. Move to the rear of your appliance. Reconnect the wire harness to the control board, and reattach the retaining clip. Grab the access panel and secure it with the screws you removed earlier. Replace the hinge screws and attach the wire and tube cover. Reconnect the water hoses to the back of your washer.
-
Plug your appliance in, and take off the tape holding the lid down. Before moving on with your day, throw a load of laundry into your washer to test the new lid latch assembly.
Other Malfunctioning Components That Lead to a Non-Spinning Washer
The Clutch connects the inner tub and the transmission. Its main purpose is to slowly help the tub reach its full speed. Unfortunately, the wear and tear it receives over the years can cause the part to break down, which leads to your washer not spinning.
The Drive Motor rotates the drive belt, which in turn spins the washer’s tub. While a defective drive motor is a rare malfunction, it is still a possibility, meaning after you have checked for more common defects, you should inspect the motor, and replace it if needed.
A non-spinning washer puts a real hitch in your day, especially if you don’t have time to run to your local laundromat. If you’ve inspected all of the components listed above and you still aren’t sure what’s stopping your machine from spinning, please contact us today, and we’ll be happy to send one of our highly trained appliance repair technicians to your home to diagnose and repair your washer.

Apr. 09, 2024
How to Resolve the Bosch Dishwasher E15 Error Code

Apr. 09, 2024
How to Balance a Washing Machine (5 Quick Tips)

Apr. 09, 2024
Solutions for a Frigidaire Gas Stove Oven Failure

Mar. 06, 2024
How to Fix a GE Ice Maker Not Working (Quick Fixes)

Mar. 06, 2024
How to Fix the Electrolux Dryer Error Code E64

Mar. 06, 2024
Is Your Whirlpool Ice Maker Not Working? Here’s Why

Feb. 05, 2024
Can Styrofoam Be Microwaved? (Safety and Risks)

Feb. 05, 2024
Agitator vs. No Agitator Washer: What’s Best?

Feb. 05, 2024
Why Is Your Refrigerator Compressor Hot? (6 Potential Causes)

Jan. 03, 2024
How to Use Dishwasher Pods

Jan. 03, 2024
How to Unlock Your Microwave

Jan. 03, 2024
How Many Watts Does a Refrigerator Use?

Dec. 11, 2023
How To Fix a KitchenAid Dishwasher That Isn’t Draining

Dec. 11, 2023
GE Oven F2 Error Code: Causes & Solutions

Dec. 11, 2023
Maytag Washer Not Spinning? 5 Simple Solutions

Nov. 06, 2023
Why Is Your Refrigerator Not Cooling?

Nov. 06, 2023
How to Get Rid of Burnt Smell in Microwave

Nov. 06, 2023
How to Fix a Dishwasher Not Cleaning Properly

Oct. 02, 2023
How Much Energy Does My Dryer Use?

Oct. 02, 2023
Maytag Washer Error Codes: How to Fix Them
(877) 560-8485Give us a call
(754) 345-5121Send us a text